Raised beds are a great way to grow plants, from fruits and vegetables to flowers, in your garden. They provide better drainage than traditional beds and also make a great feature to your garden! Learn more about raised beds, how to create them and how to maintain them.
What are Raised Beds?
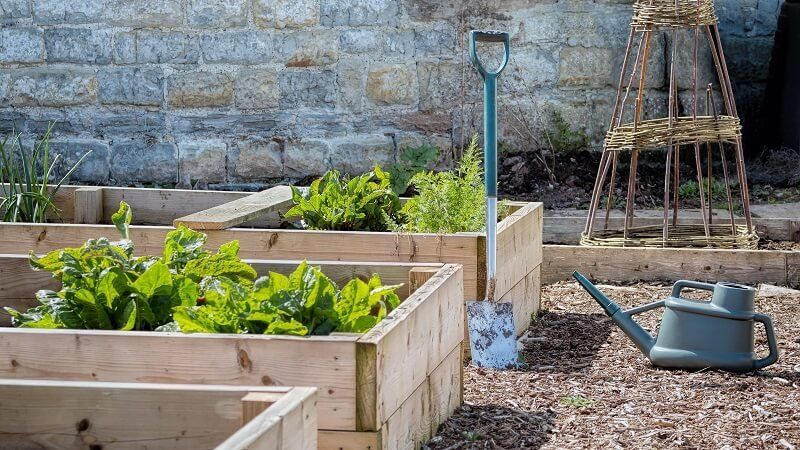
Raised beds are areas where soil is elevated from ground-level using a frame, usually made from wood, although it can be concrete, rock or brick. The frame is filled with soil and compost for planting vegetables, fruit or flowers above ground level. They are boxed areas that can be any size or shape.
What are the Advantages of Raised Beds?
People choose to install raised beds in their gardens for a huge number of reasons. One of the most important advantages of having raised beds is that they allow better drainage than ground-level plots. It prevents plants from becoming waterlogged and allows roots to grow better. Another important advantage is that they increase soil temperature. Being raised means that soil is protected from the cold and the temperature of the bed is slightly higher. It’s ideal for early spring planting, as well as maintaining better conditions for plants.
10 Advantages of Raised Garden Beds:
- Improve drainage
- Introduce different soil types – Raised beds allow you to introduce a different type of soil into your garden, increasing the variety of plants that you can grow.
- Increase soil temperature
- Improve access – For people who struggle to bend down, raised beds are a great way to ensure easy access to plants.
- Prevent soil compaction – As they don’t have people walking on them, raised beds protect the plants and keeping the soil aerated.
- Keep pathway weeds at bay – Being lifted away from paving means that weeds that grow on pathways are kept from affecting your plants.
- Deter pests – while some pests will inevitably reach your plants, the height and barriers deter pests and reduce the number of pests that can affect your plants.
- Protect soil during heavy rain – The barriers prevent soil from washing away and eroding during extreme weather or heavy rain
- Used to make the most of sunny areas – You can choose where to place raised beds and can therefore better make the most of the different conditions around your garden.
- Improve garden aesthetic – You can use raised beds to create designs in your garden, better organise your space and make your garden look neater.
Raised beds also allow you to grow vegetables and fruit around your lawn without compost spreading onto your grass and ruining the look. It keeps everything tidy so your garden looks fantastic!
Disadvantages?
With so many advantages, you might ask what the drawbacks are. There are very few problems associated with raised beds, but the main disadvantage is that they, at least initially, cost more than simply growing vegetables at ground level in spaces that are already set up.
You have to buy the containers or barriers, and possibly the soil to fill them, depending on what soil or compost to which you already have access. However, once your beds are set up, they don’t really have any additional cost compared to standard beds.
Raised Garden Beds vs Planters
Raised garden beds and planters aren’t the same. Planters always have a bottom, usually will holes drilled in to allow drainage. Raised beds, on the other hand, don’t have a bottom but are connected directly to the ground below. This means they have better drainage than planters but are more permanent.
How to Create A Raised Garden Bed
Raised beds can be built at any time of the year. A lot of gardeners like to build them in winter so, come spring, the garden is all ready for new planting.
The first thing to consider when building raised beds it where to place them.
Placement
Choose where you want to construct your raised beds. It’s usually best to pick the sunniest areas of your garden and place your bed with the longest side facing south. This ensures the best and most even sunlight for all your plants. However, if you’re planning on growing plants that prefer shade, pick the most appropriate place for them.
Also consider the layout of your raised beds. Think about the size and shape of them and how you’ll move around your garden. You can use raised beds to create aesthetically pleasing designs in your garden, but if it’s not well planned out it could make moving around your space a nuisance!
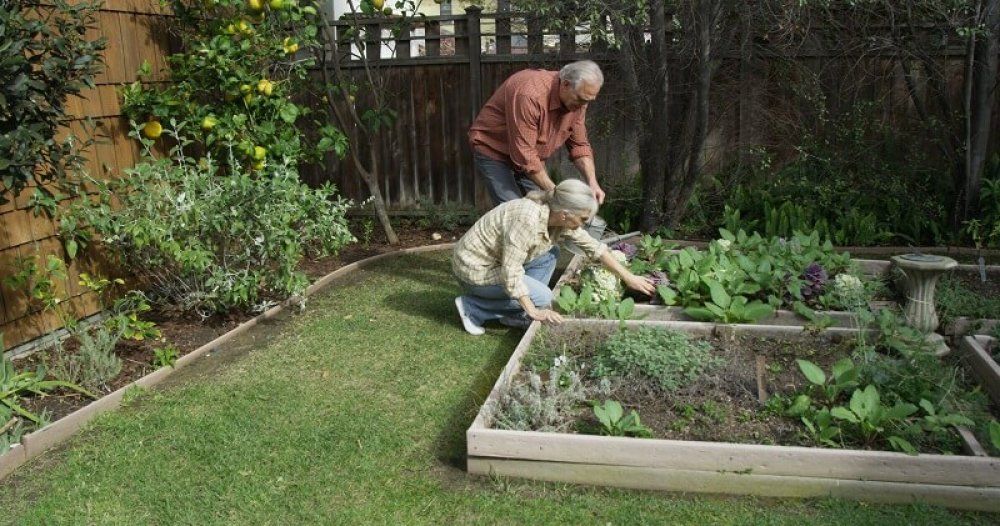
When it comes to size, it’s best to have beds no wider than 1.5m as this means you don’t have to step onto the bed in order to maintain them — this helps to keep the soil from becoming compact.
If you’re building a lot of raised beds, consider not making them too long so they’re easy to move between. People might otherwise be tempted to climb on them to cross to the other side.
You should also decide how high you want your raised beds. They can be anything from 6 inches high to three feet! It’s personal preference. The higher your beds, the more soil it will take to fill them, but the easier it’ll be to access your plants without backache! The height might also depend on what material you’re constructing the beds from. High beds will require sturdier material to prevent the weight of the soil from causing the sides to bow outward.
Materials
Consider what material you want to use to create your raised bed. Each have different advantages so think about your budget, aesthetic and the different qualities each would bring.
Timber: Timber is the cheapest option and the most budget-friendly. The drawback is that it doesn’t last as long as other materials.
Sleepers: Sleepers are extremely sturdy and therefore more long-lasting than timber. They are, however, more costly and, because of their sturdiness, can be difficult to cut to specific lengths.
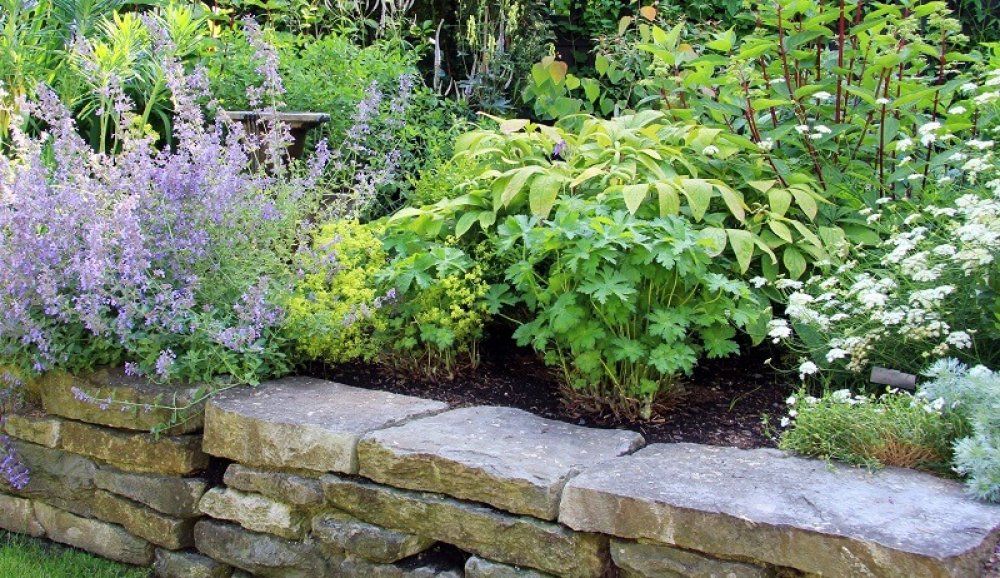
Masonry: Masonry, including stone and brick, can be a great choice but they are the most permanent option and leave little room for change!
You can buy ready-made raised beds from garden centres which are ideal for smaller projects. They’re not as customisable as making a raised bed yourself and can be less cost effective if you’re wanting to create a lot of beds, but are a fantastic low-effort solution!
Constructing Your Raised Bed
1. Clear the Area
Clear the area of space where you’re going to place your bed. It’s important that you remove grass from the ground and turn (dig) the soil so it’s loose and ready for the raised bed to go on top.
2. Cut and Assemble the Frame
If you’re using wood, assemble it to form the frame. To do this, place retaining stakes into the ground at the corners, and then every 1.5m along the set area. This will support the sides and set your bed into the ground. Attach the sides to the retaining stakes using screws (or nails).
If you’re using masonry, use concrete footings on deep, hardcore foundations to provide a foundation for any wall higher than 20cm and join them with mortar.
If you’re using sleepers or logs, these can be laid directly onto firm soil, but ensure the ground is level before placing the sleepers. Drill holes into the sleepers vertically in each corner and secure them together through the holes with metal rods.
3. Fill the Bed
Once the frame is in place, you need to fill the bed. The soil you use is up to you. You might have access to the right quantity of soil from another place in your garden or have to buy it in, but either way, enrich it using compost or manure to increase the quality of the soil and ensure your plants grow as well as possible.
4. Allow to Settle
It’s important to give your new bed at least two weeks to settle before you begin planting. If you’ve created your bed in the winter, you can cover it with plastic sheeting to protect it from ice and to maintain a warmer temperature. This will ensure it’s ready for planting at the first signs of spring!
5. Plant!
Once you’ve given the bed time to settle, you can get planting! The warmer temperature of the beds mean you can get plants growing even earlier in the spring than with ground-level beds.
The great thing about raised beds is that you can arrange and organise your vegetables extremely effectively to encourage plants to grow more uniformly while discouraging weeds.
It’s also easy to manage rotations around your garden, with different raised beds being used for different crops. This ensures the soil stays healthy and is full of the right nutrients for different plants.
How to Maintain a Raised Bed
Raised beds don’t need much more maintenance than ground-level beds, but there are a few things to look out for.
Watering Your Bed
Because they have better drainage, in dry and hot conditions raised beds can dry out more easily than other areas of your garden. Keep an eye out for this and use water from your waterbutt to keep the soil moist.
Walking On The Soil
Be sure you avoid walking on the soil of your raised garden bed wherever possible as this will cause it to become compact. You also risk stepping on your plants!
Mulch and Supplementing Soil
Again, due to the effective draining, it’s a great idea to use mulch on your raised beds. This can be made from anything and will help to fertilise your soil.
The raised bed will also continue to settle so you might need to supplement the soil levels every year or so.
Raised Beds
Raised garden beds are a fantastic way to grow vegetables, fruit or flowers and create new designs in your garden. There are so many advantages to growing fruit and vegetables in a raised bed, why not give it a try!