Learn how to create a rain garden to make the most of the British climate and produce a beautiful space in your garden!
What is a Rain Garden?
A rain garden is a shallow area of garden into which water from rain can runoff from the roof (or other hard surfaces) and collect, watering sturdy plants that like wet conditions.
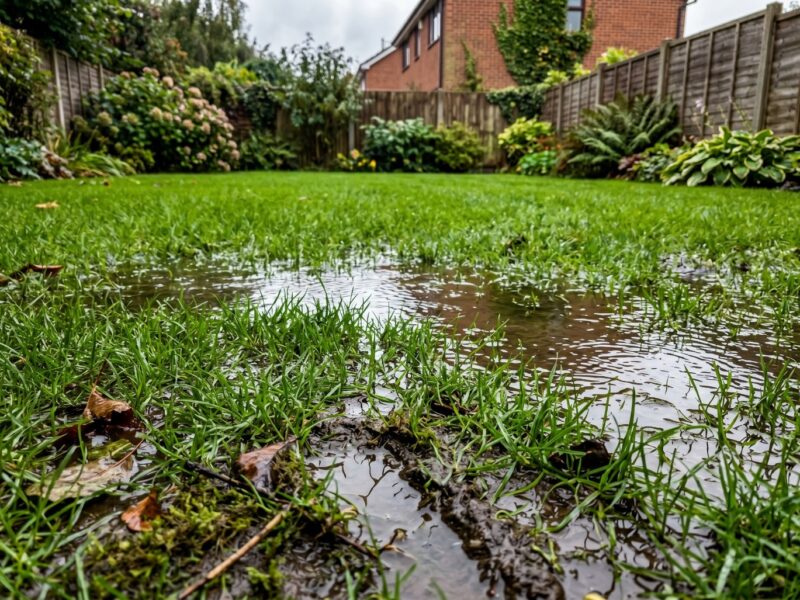
It works particularly well for low lying areas in a garden that often get water logged from rain running off surfaces and into them. It lets you make the most of conditions that naturally occur in your garden, creating beautiful and usually low maintenance spaces.
You can also include other features in a rain garden, such as a pond, waterbutt or even a stormwater planter.
Benefits of a Rain Garden
The benefits of a rain garden include:
- A beautiful, low maintenance area
- Reduces soil erosion after heavy rainfall
- Provides opportunities to plant a wider range of perennials
- A wider range of plants means increased ability to attract more insects and birds into your garden.
Setting Up The Rain Garden
A rain garden is a great way to make your garden look fantastic while making the most of natural water runoff.
Choosing the Right Space
The key part of creating a rain garden is choosing the right area in which to make it. You have to consider various factors to decide if the space is going to work.
Sunlight: A rain garden needs to be in either full sunlight or partial shade. Avoid areas that are always completely in shade as fewer plants will thrive here.
Distance from house: They should be situated at least 3m away from the house to prevent any damage to the house foundations due to water filtering down.
Drainage: The purpose of the rain garden to to collect and filter water so it’s important that the area has the ability to drain itself. Therefore choose an area that is well-drained or on a slight incline.
If you have a space in mind, you can test if the area is suitable by digging a small sized hole to a depth of 25cm and fill it with water. Let it drain once and refill. This second time, observe the time it takes to drain.
You’re looking for an area that drains at 1.25cm (half an inch) per hour the very slowest, but ideally faster than this. Any slower and the area isn’t suitable. You can go up to rates of around 5cm per hour.
Choosing the Size
The size is up to you, but a smaller rain garden is more likely to overflow than a larger one.
One way to calculate what size will work best for you is to look at the surface area of the roof that is collecting water and running off into the garden. It’s good to have a rain garden that is about 20% of the area of the roof for optimum collection and filtration of water.
Depth
Along a similar line, you need to choose a good depth for your garden. For soil that drains at 5cm per hour, a depth of 15cm would work best — with an extra 5cm-10cm at the lowest point where excess water would leave. If you soil drains more slowly, you will need to have a deeper rain garden.
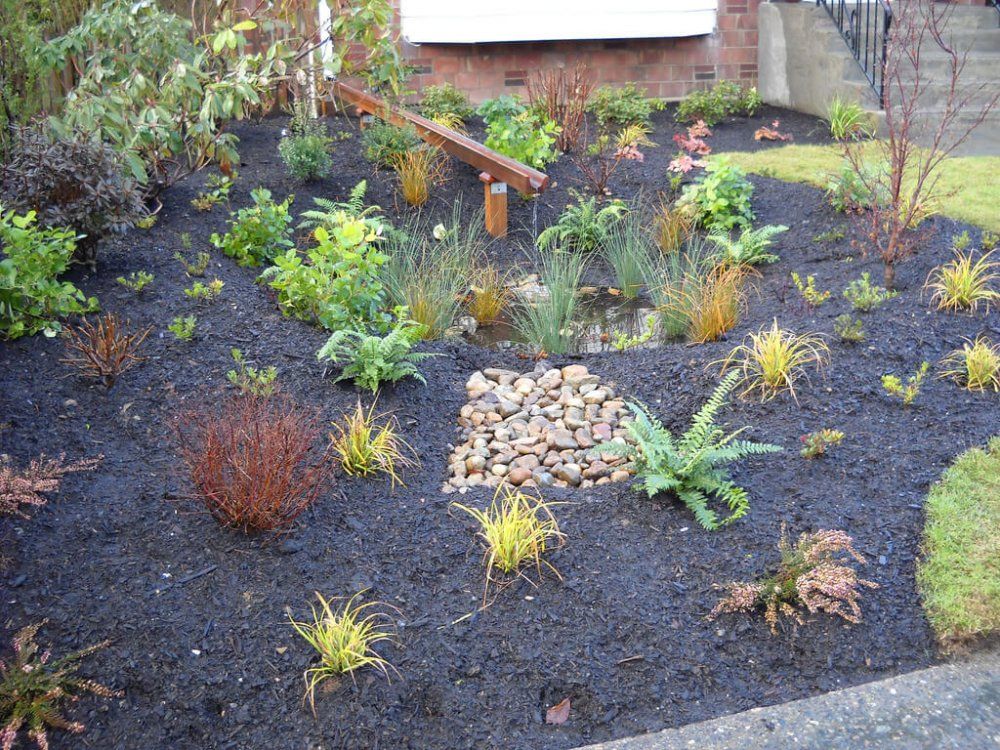
Making the Rain Garden
Once you’ve established the placement, depth and size, it’s time to get to the fun part!
1. Shape
Use stakes and string, or just your garden hose, to outline the shape and area of your rain garden. A kidney shape often works particularly well.
2. Remove plants
Remove any existing vegetation, including turf grass. You should be able to do this with a spade.
3. Dig the garden
Using your outline shape as a guide, dig your rain garden. Ensure that it’s like a bowl with the outsides more shallow than the middle and use your calculated depth from previously to ensure you’re digging it correctly. If you’re working on a slope, make sure that the rain garden is level.
4. Make a berm
Use some of the soil you dug out to make a berm — which is a lip on three of the sides. It needs to be about 30cm wide and 10cm in height and made from well compacted soil. This helps to keep the water in the rain garden. Leave a notch in the berm and fill the channel with gravel to create an exit for the water to drain out of.
5. Compost
Mix the soil you dug out (that didn’t go into the berm) with organic matter and compost then use it to refill the rain garden. You can use leaf or grass-cutting mould, compost or well rotted manure, for example. As you fill it in, ensure that the soil stays loose and is not compact.
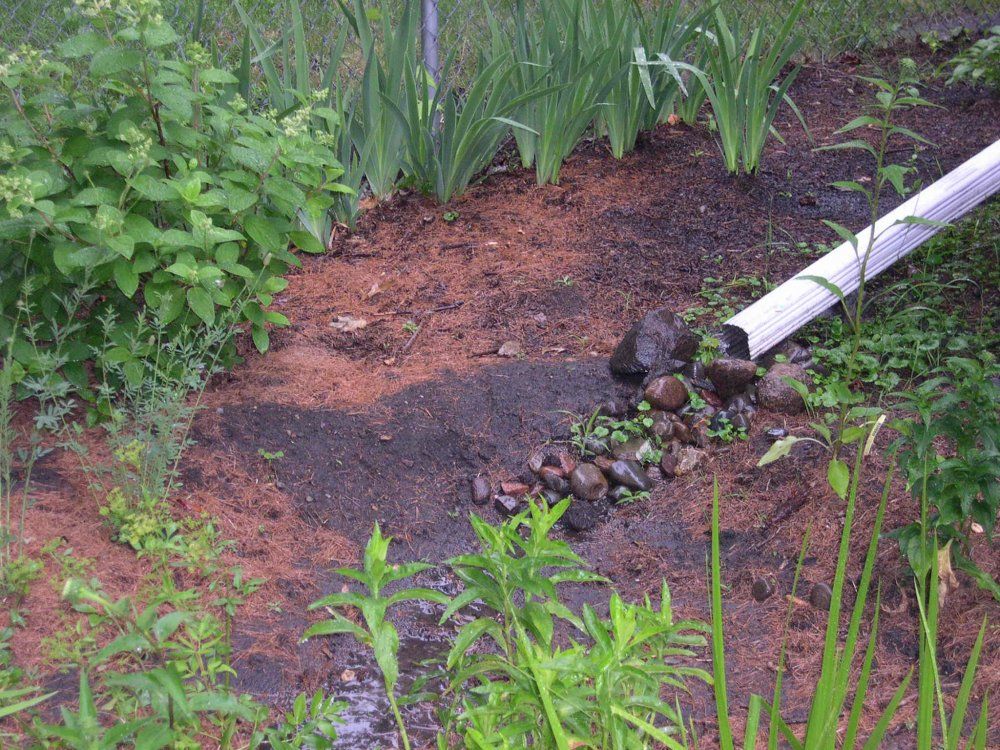
Getting the Water In
Once the rain garden is set up, you need to get the water in!
1. Make a Channel
Make a channel using bricks or setts. These will carry the water the few meters from the drainpipe to your rain garden.
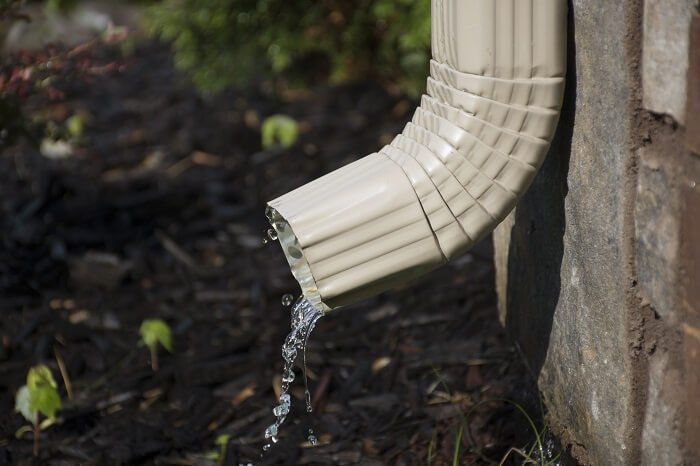
2. Downpipe Diverter
Install a diverter in the downpipe that leads from the roof gutter to your channel. This will direct water towards your rain garden. It can be a good idea to add gravel or cobbles at the point where the water enters the rain garden to prevent the soil from washing away during rain.
Planting the Rain Garden
The final step is to plant the rain garden. Plants are the essential finish to help with drainage and improve the look of the final area.
1. Check water tolerance of plants
Ensure you choose plants that are able to withstand wet conditions and put these near the water inlet.
Some plants that might work (depending on you soil conditions) are:
- Iris pseudocorus (Yellow iris)
- Juncus effusus (Soft rush)
- Carex pendula
- Lobelia cardinalis (Cardinal flower)
- Zantedeschia aethiopica (Arum lily)
Then fill the rest of your rain garden with plants that prefer moist to average environments. Remember that your rain garden is not the same as a bog garden; it is designed to drain in 24 hours so you don’t want plants that need constant wet conditions as they might not get them!
You could try (among others!):
- Cornus sanguinea (Midwinter Fire)
- Hydrangea ‘˜Annabelle’
- Rosa rugosa (Beach Rose)
- Campanula glomerata (Clustered bellflower)
- Hemerocallis (Day Lilies)
- Deschampsia cespitosa
- Miscanthus sinensis cultivars
Variety
Also choose a variety of different plants for your garden such as ones that will attract bees and other insects. Grasses provide shelter for insects in winter so can be another great choice.
Water
Generally, you shouldn’t need to water your rain garden, but you might need to water it well in the first two years if the summer is dry.